JDBC Connection
In this section, we will learn how to centralize a JDBC connection through Metadata in Talend Studio for the Data Integration platform.
Follow the below steps to connect Talend with JDBC Database:
- Set Up a Database connection
- Retrieve the table schemas
Set up a Database Connection:
To set up a relationship between a JDBC and Talend, follow the below process:
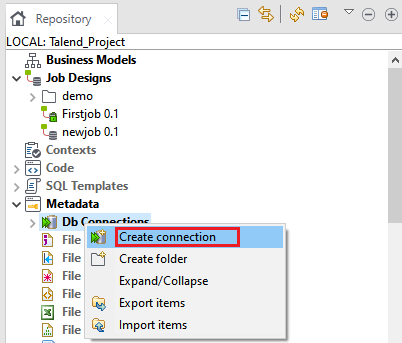
- Open the Talend studio, go to the Repository pane, and move our cursor towards the Metadata
- Then, right-click on the Metadata, and select Create connection option in the Db Connection, as shown in the below image:
Repository → Metadata → Db Connections → Create connection
The Database connection for JDBC will be completed in two steps.
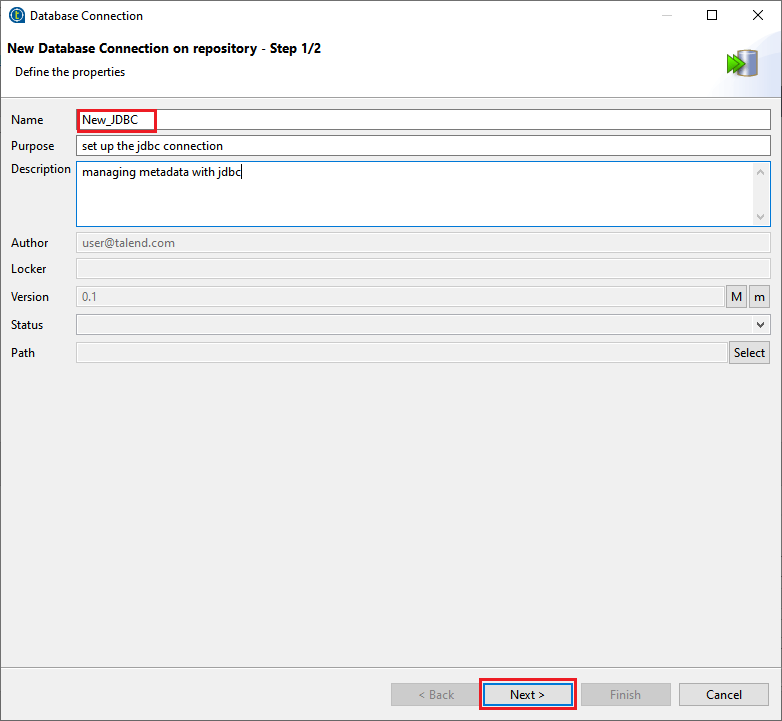
Step1: New Database Connection on Repository
- After clicking on the create connection, the Database Connection window will open, where we will fill all the mandatory fields.
- Click on the Next button, as we can see in the below screenshot:
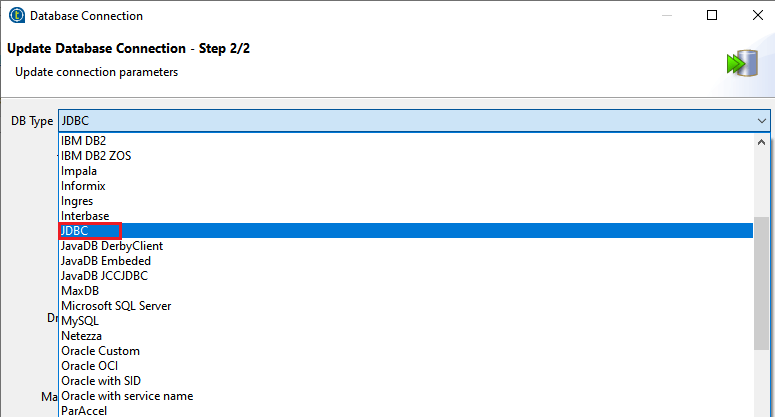
Step2: Update Database Connection
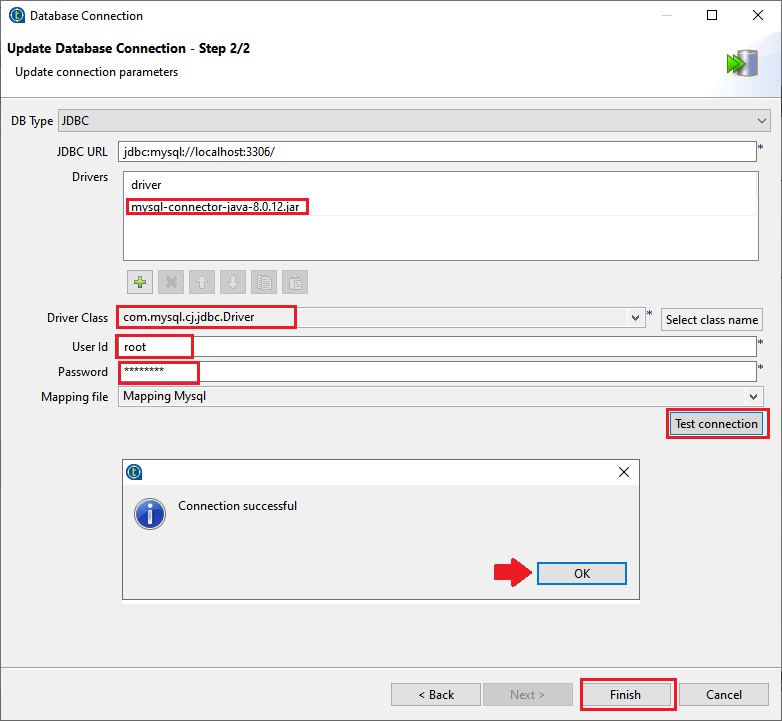
- Once we clicked on the Next button, we will Update Database connection, and select the DB type as JDBC, as we can see in the below image:
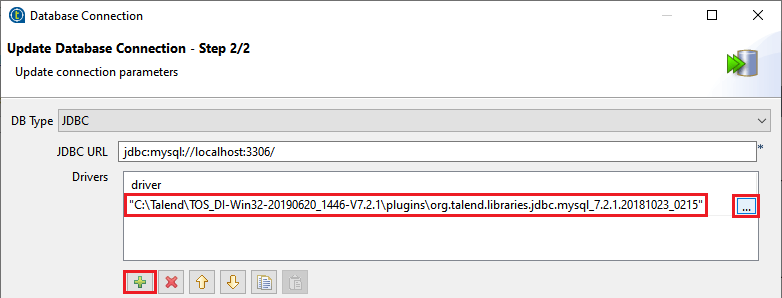
- After selecting our Database, we will fill all the information about the chosen Databases like JDBC URL, Drivers, Driver class, User Id, Password, and Mapping file,
- To access the database server, fill the JDBC URL as jdbc:mysql://localhost:3306/
- Select the jar driver for validating our connection to the database in the Driver jar
- Click on the [+] button to add the driver-jar file, and give the path of the jar file from our local system as we can see in the below image:
- Then click on the […] button, the Module window will open
- Click on the Platform radio button, and select the mysql-connector-java-8.0.12.jar file, and click on the OK
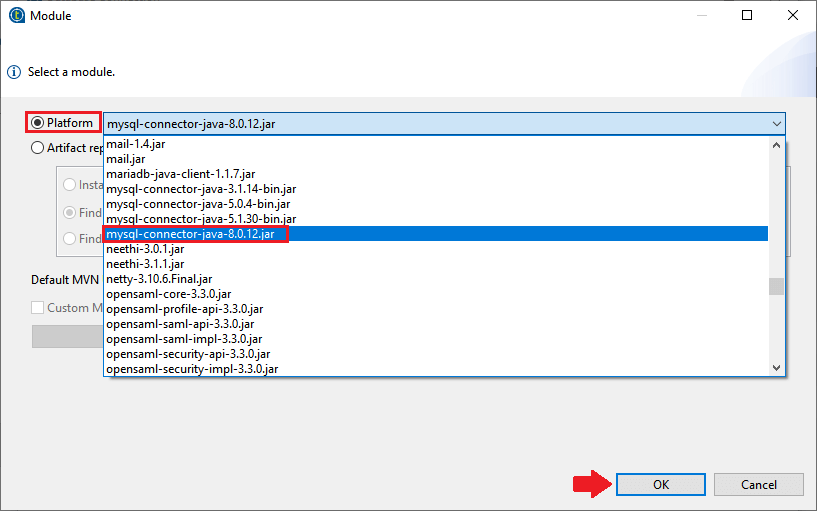
- When we click on the OK button, it takes driver jar (mysql-connector-java-8.0.12.jar) automatically.
- After that, select the Driver class from the Select class name button that allows us to communicate with the database.
- Then, give your user ID and Password same as MYSQL DB connection.
- At last, click on the mapping file dropdown list and select the mapping file based on the type of the database.
- The mapping file of the database must be matched to the java type of data on the schemas, and in our case, we are selecting Mapping MySql.
- Once we have established the connection details, we will click on the Test connection button to check our connection.
- If the connection is successful, we get a message “connection successful“.
- Then, click on the Finish button to close the connection setup window, as we can see in the below screenshot:
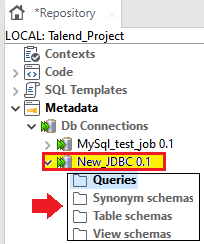
The JDBC connection that we have created appears in the Repository panel.
It contains various folders like Queries, View schemas, Synonyms Schemas, and Table Schemas, as we can see in the below image:
Retrieve the table schemas
To recover the table schemas from the database connection, which we have created above:
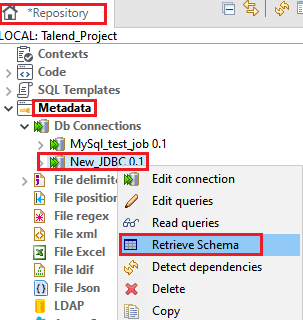
- Go to the Repository panel, and right-click on the New_JDBC DB connection in the Metadata’s Db connection node.
- And select the Retrieve schema from the pop-up menu, as we can see in below image:
Repository → Metadata → Db connections → New_JDBC → Retrieve Schema
- A new window will open, where we can filter the database object and show the various objects like Table, Views, and Synonyms in our database connection.
- We can also select the tables of our needs, and define the table schemas.
For filtering the database objects, follow the same process as we did in the previous session of the tutorial.
After filtering the list of database objects, follow the below process to load the schemas of the desired objectives into our Repository.
- We are selecting the one or more database objects on the list, and clicking on the Next button to see the list of the filtered database object.
- The list offers all the databases with all their tables present on the database connection that meets our filter conditions.
- We can also change schemas if we needed, and verify that the data type in the Type column is correct.
- But here, by default, the schema displayed on the schema panel is based on the first table that is selected in the list of the schemas loaded (left panel).
- We can change the name of the schema based on our needs, and we can also customize the schema structure in the schema panel.
- And the toolbar allows us to add, remove, or move columns in our schema.
For retrieving a schema based on one of the loaded table schemas:
- Select the DB table schema name in the dropdown list, in our case we are taking emp_employee as DB table schema, and click on the Retrieve schema button, as we can see in the below image:
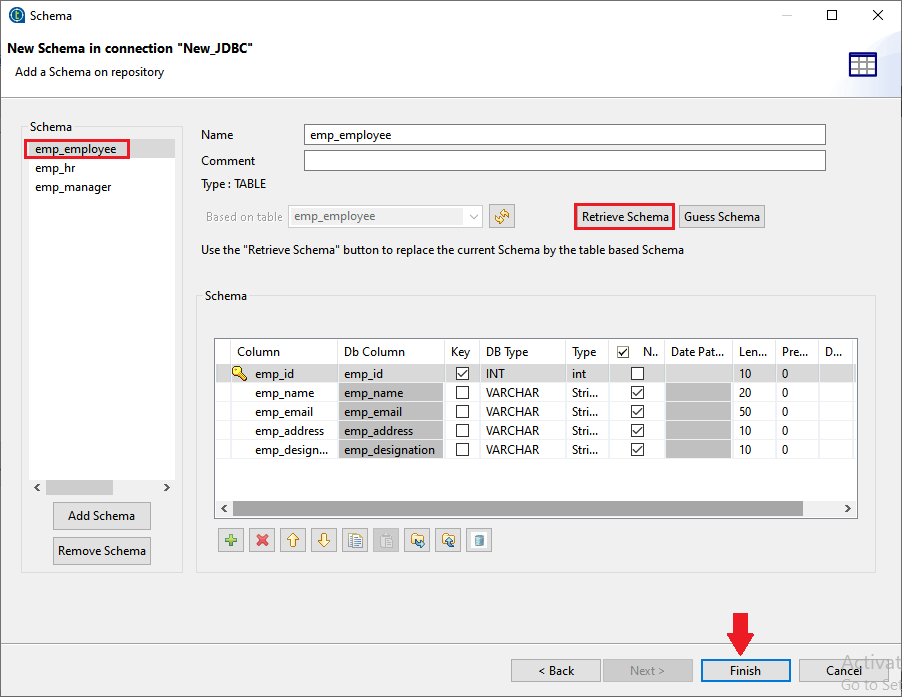
Click on the OK button to verify the changes.
After that, click on the Finish button to complete the database schema creation.
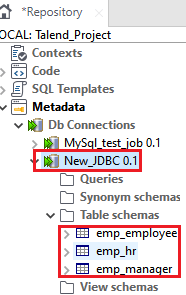
To verify that the data is recovered or not:
- Go to the Metadata section in the Repository panel.
- Expand the Db connections, and see in the below image that the retrieved schema is displayed in the Table schemas sub-folder.
- Now, we can drag and drop any table schema of the database connection from the Repository panel onto the design workspace as a new database component or an existing component to reuse the Metadata.