Reshaping Objects
The shape or size of the object can be easily modified in Adobe Illustrator with the help of Adobe tools and commands. We can also use the filters, effects, and masks.
Cropping Image in Illustrator
With the help of the crop tool, we can crop the linked or embedded images in Illustrator. We can use the initiative widget control to work with the selected image. Always remember that the cropped portion of the image will be discarded and cannot be recovered.
To crop an image, follow these steps:
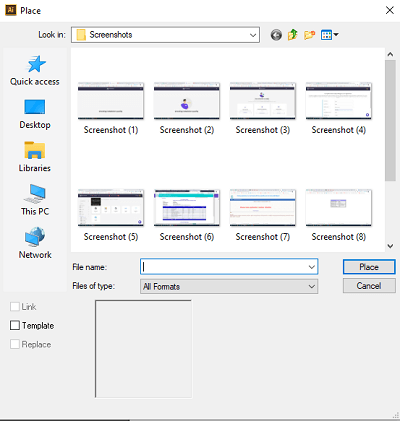
Step 1: Go to the File menu and click on the Place option from the drop-down.

Step 2: Now, the Place dialogue box will appear. Select the image you want to place and click on the Place button.
Step 3: To crop the image, do one of the following:
- Click on the edit original from the control panel and crop in the paint option.
- Or, go to the object menu and click on crop image from the drop-down.

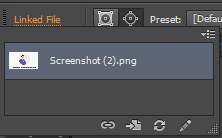
Step 4: Adobe Illustrator prompts you about the linked files are embedded after cropping if you’re working with a linked image.
Step 5: To define the crop boundaries, you have to drag the widget corner, and edge handles.
Step 6: Finally, click Apply on the control panel.
Cropping options
We can specify the following options on the Control panel while cropping an image:
PPI: It can be used to specify the resolution for the cropped image from the available options. If the resolution of the picture is lower than the options available in the drop-down list.
Reference Point: The transformation that is performed around a fixed point called the reference point. The reference point is at the center of the crop widget you are transforming.
X and Y dimensions: It can be used to set the coordinate values of the selected reference point.
Height and Width: It can be used to specify the size of the crop widget  .
.
Transforming objects
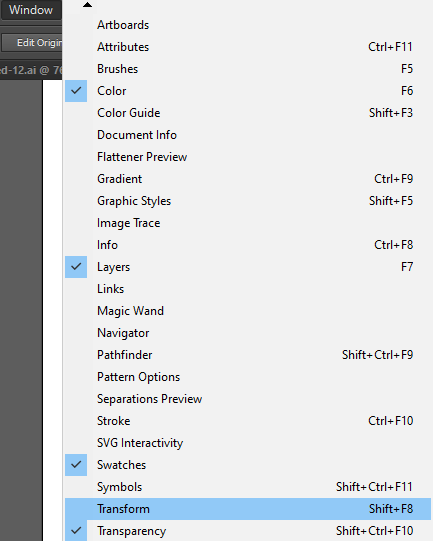
Transforming an object means rotating, moving, reflecting, sharing, and scaling of the objects. The objects can be transformed using the Transform panel. You can open the transformation panel from Windows → Transform.
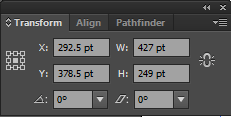
Overview of the Transform panel
The panel displays information about the location, size, and orientation of one or more selected objects. The selected objects can be modified by typing new values. Each and every value in the panel refers to the bounding boxes of the objects except for the X and Y value.
Transform an object’s patterns
We can transform the object and pattern when we move, rotate, reflect, scale, or shear an object that is filled with the pattern.
- For the transformation of the object using the Transformation panel using the options: Transform Object Only, Transform Pattern Only, or Transform both.
- With the help of transformation command, set the object and Pattern options in the corresponding dialogue box.
- If you want to transform patterns but not objects when using a transform tool, hold down the tilde key while dragging your pointer.
Transform objects using the bounding box
If one or more objects are selected using the Selection tool, a bounding box will appear around them. You can use the bounding box to move, rotate, duplicate, and scale objects easily by dragging the object or a handle.
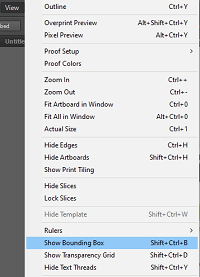
- Go to View menu and click on Show Bounding Box to show the bounding box.

- Go to View menu and click on Hide Bounding Box to hide the bounding box from the artboard.
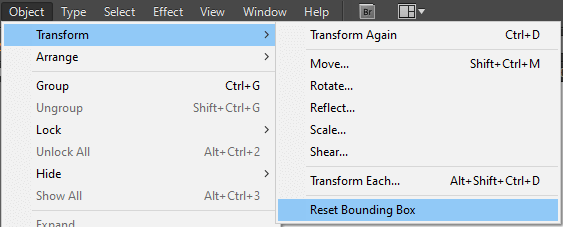
- Go to Object menu → Select Transform → Click on Reset Bounding Box to reorient the bounding box after you rotate it.

Cut, divide and trim objects
Dividing the Objects: The Divide Object Below command can be used to divide the object. It acts as a cookie cutter or stencil. It discards the original selection and uses a selected object to cut through other objects.
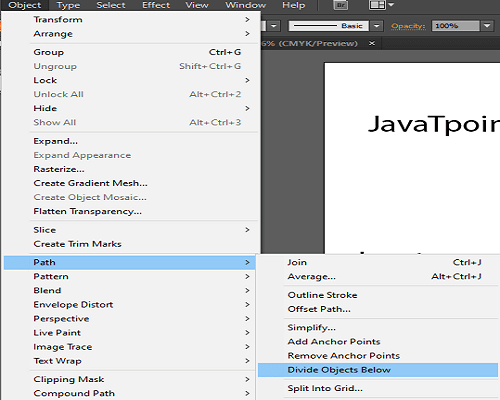
Step 1: Go to the artboard and select the object you want to use as a cutter and position it in a way it overlaps the objects to cut.
Step 2: Now, click on the Object menu → Path → and Select Divide Objects Below.
Split Into Grid
The command allows you to divide one or more objects into multiple rectangular objects that are arranged in rows and columns.
Step 1: Open the artwork and select the object you want to split.
Step 2: Go to the object menu and select the Path from the drop-down. Then select the Split into Grid from the sub-menu.
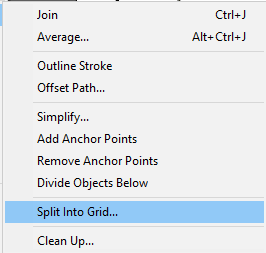
Step 3: Fill the number of rows and columns on the Split into Grid dialogue box.

Step 4: Click on, OK.
How to Cut Path at Selected Anchor Points
You can cut the Path at the selected anchor point using the Cut Path At Selected Anchor Point  . The anchor point becomes two anchor points in which one will be located directly on the top of the other.
Step 1: Open the artboard and select the Path to see its current anchor points.
Step 2: Now, select the anchor point at which you want to split the Path using the Direct Selection tool  .
.
Step 3: Select the Cut Path At Selected Anchor Points  from the control panel.
Step 4: To adjust the new anchor point or path segment, use the Direct Selection tool  .
.
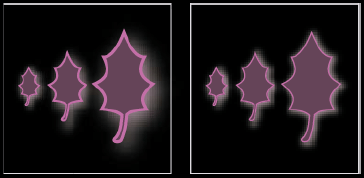
Trimming objects using clipping masks
The mask clipping allows us to use an object to hide portions of other objects.
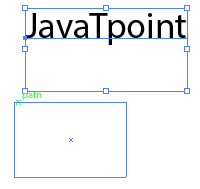
Step 1: Open the artboard and create an object you want to use as the mask.

Step 2: Now, move the clipping path above the objects you want to mask in the stacking order.
Step 3: After moving the clipping path, select the clipping path and the objects you want to mask.
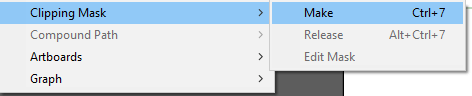
Step 4: Go to the Objects menu → Clipping Mask → Make.
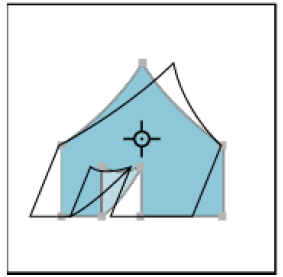
Scaling, shearing, and distorting objects
Scale objects: It enlarges or reduces our objects horizontally, vertically, or both. The scaling of the objects varies depending on the scaling method you use and can be scaled relative to a reference point. Follow these steps to scale your object.
Step 1: Select one or more objects after opening the artboard.
Step 2: Go to the Tools panel and select the Scale tool  .
.
Step 3: Drag anywhere in the document window until the object converted to the desired size.
Shear objects: The method slants, or skews, the object along the horizontal or vertical axis, or a specified angle that is related to a specified axis. The specified objects shear related to a reference point that varies with different shearing methods. Follow these steps to shear an object.
Step 1: Select one or more objects after opening the artboard.
Step 2: Go to the Tools panel and select the shear tool.
Step 3: Drag anywhere in the document window until the object converted to the desired size.

Distort objects: we can distort objects using the Free Transformation tool or a liquefy tool. When we want to distort freely, we’ll use the free transformation tool. But if we want to take advantage of the specific preset distortions such as twirls, puckers, or wrinkles, we’ll use a liquefy tool. Follow these steps to distort an object.
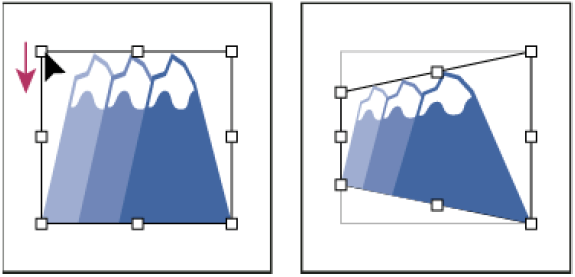
Distort objects with the free Transformation tool
Step 1: Select one or more objects after opening the artboard.
Step 2: Go to the Tools panel and select the Free Transformation tool.
Step 3: Click on the corner handle of the bounding box and start dragging.
Step 4: Hold down the Ctrl until the selection is at the required level of distortion.
Distort object using a liquefy tool
The linked files or the objects that contain text, graphs, or symbols cannot be used with the liquefy tool.
Step 1: Open the artboard and select an object.
Step 2: Click on the liquefy tool and click or drag over the object you want to distort.
Step 3: If you want to isolate the distortion to a specific object, then select the objects before using the tool.