Examples of QuickCalc
Here are the examples using QuickCalc in AutoCAD.
Example 1
To draw a line from the center of a triangle
The steps are listed below:
- Draw a triangle.
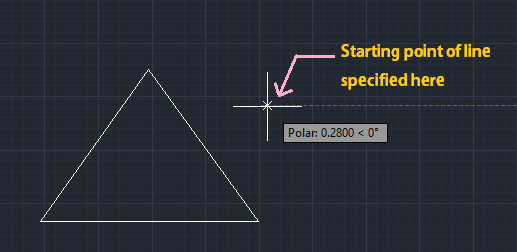
- Select the line command and specify the starting point of the line. The line will be drawn from that starting point to the center point of the triangle.
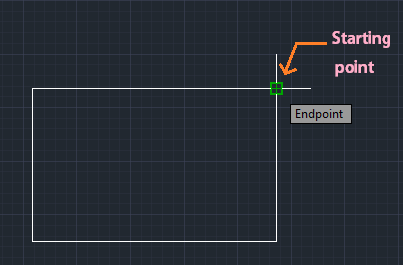
We have specified the starting point of the line as shown in the below image:
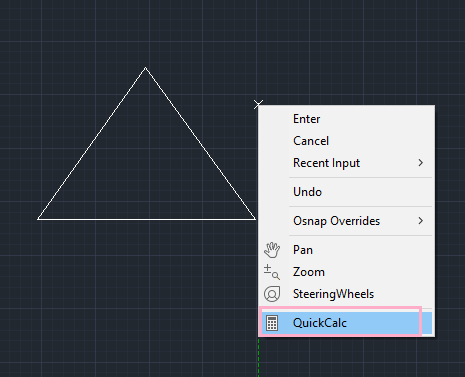
- Right-click on that starting point and select QuickCalc as shown in the below image:
- Write (end + end + end)/3 on the QuickCalc display and press Enter.
- Specify the three endpoints of a triangle using the cursor (the cursor will appear in square shape).
- The calculator will display the coordinates of the center point of the drawn triangle, as shown in the below image:
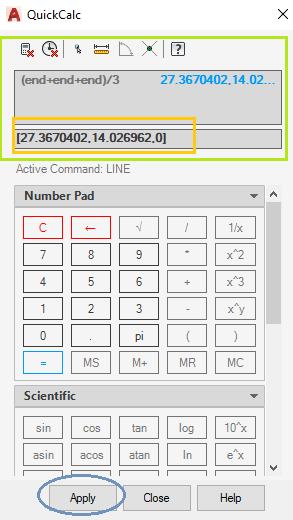
- Click on the Apply button, as shown above.
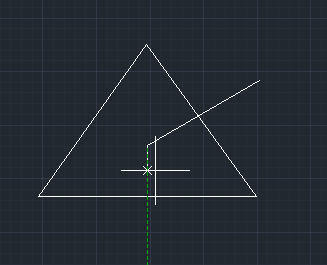
- The line will be drawn from the specified point to the center point of the triangle as shown in the below image:
Example 2
To draw a line from the center of a rectangle.
The steps are listed below:
- Draw a rectangle.
- Specify the starting point using line command on the rectangle, as shown in the below image:
We can specify the starting point according to our choice.
- Right-click on that starting point and select QuickCalc. The calculator will appear on the screen.
- Write (end + end + end + end)/4 on the QuickCalc display and press Enter.
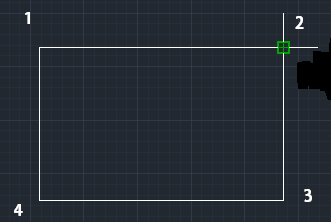
- Specify the four endpoints of a rectangle using the cursor (the cursor will appear in square shape). The four points must be selected in an order.
The order is shown in the below image:
- The calculator will display the coordinates of the center point of the drawn rectangle, as shown in the below image:
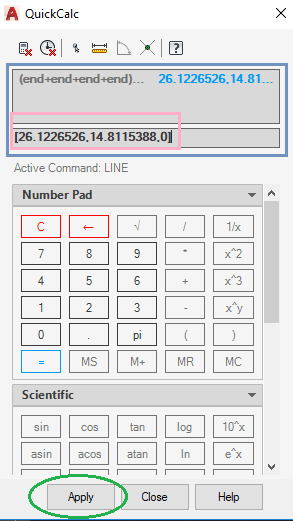
- Click on the Apply button, as shown above.
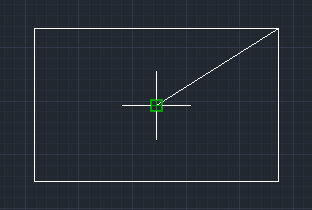
- The line will be drawn from the specified point to the center point of the rectangle, as shown in the below image:
Example 3
To draw a line from the center of a circle.
The steps are listed below:
- Draw a circle. The circle can be drawn with any specified radius according to our choice.
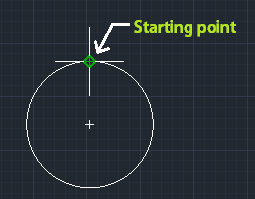
- Specify the starting point using the line command anywhere around or on the circle.
Here, we have specified the starting point on the circle as shown in the below image:
- Right-click on that starting point and select QuickCalc. The calculator will appear.
- Write (cen + cen)/2 on the QuickCalc display and press Enter.
- Select the two entities for the center snap using the cursor.
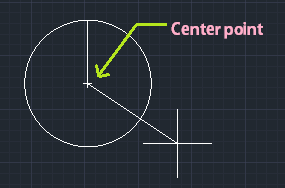
- The calculator will display the coordinates of the center point of the drawn circle.
- Click on the Apply button at the bottom of the calculator.
- The line will be drawn from the specified point to the center point of the circle, as shown in the below image:
Example 4
To draw a line from center of a triangle to center of a hexagon.
The steps are listed below:
- Draw a triangle and a hexagon.
- Specify the center of a triangle using the method discussed above.
- Right-click on the starting point (center of a triangle) and select QuickCalc. The calculator will appear.
- Write (end + end + end + end + end + end)/6 because there are six sides of a hexagon.
- Select the six entities of a hexagon using the square-shaped cursor in the clockwise order.
- The calculator will display the coordinate of the center of the hexagon.
- Click on the Apply option at the bottom of the calculator.
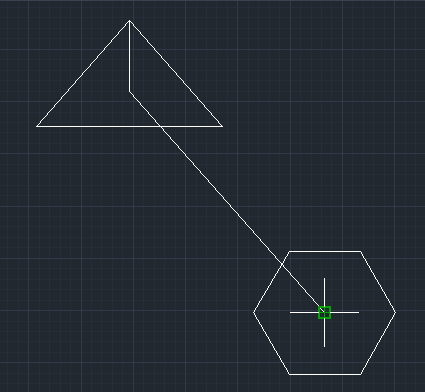
- The line will be drawn from the center of a triangle to the center of a hexagon as shown in the below image:
We can use the calculator to specify the distance to draw line, to move objects by a specific distance, etc.
Let’s consider below example:
To draw a line using QuickCalc
The steps to draw a line using the QuickCalc are listed below:
- Select the line command on the ribbon panel or type line on the command line.
- Specify the first point of line on the workspace.
- Enter the value in the calculator.
- Click on the “paste value to command line” icon on the top of the calculator.
- The value will be pasted on the command line.
- Press Enter. The line will be drawn with the specified value using the calculator.
Similarly, we can use the calculator in many other ways.