Started with QuickCalc
The calculator in AutoCAD is called as the QuickCalc. It is considered as an accurate calculator for quick measurements. The QuickCalc has wide applications in AutoCAD.
We can access the QuickCalc in AutoCAD in different ways, as already discussed.
Let’s begin with the QuickCalc.
Below are the steps to start with an example.
- Open the AutoCAD software. We can install any version according to our system requirements.
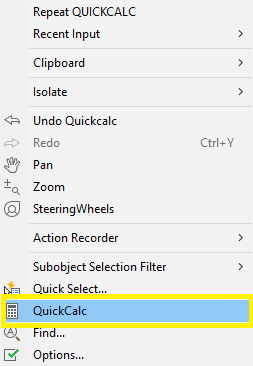
- We can consider either way to open the calculator. Let’s open it by right-clicking on any area in the workspace or drawing area and select QuickCalc as shown below:
- The calculator will appear on the left corner of the AutoCAD screen. We can expand the option on the calculator by clicking on the arrows in front of a particular option.
- Let’s start by considering an example shown in the below image:
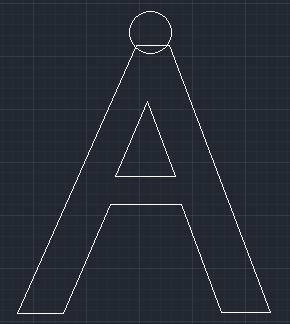
We can draw any figure according to our choice.
The above figure is just for a better understanding.
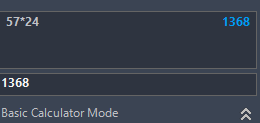
- We can access the keywords either by clicking on the number pad or the keyboard on our computer. For example, the multiplication of 57 x 24 will result in 1368 as the answer, which is shown in the below image:
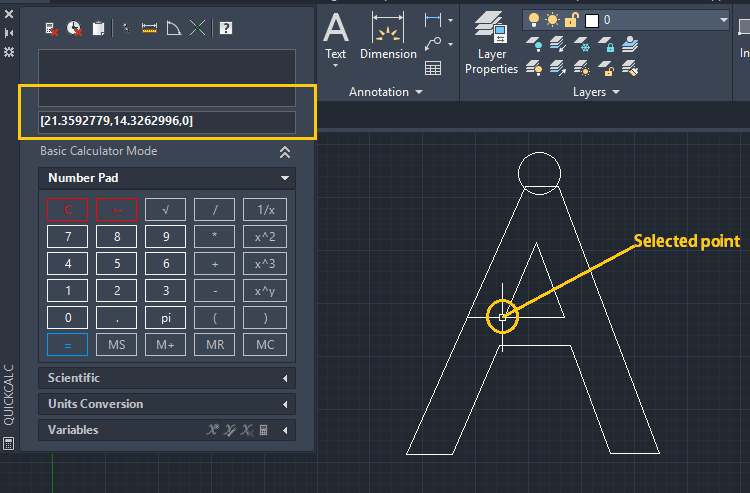
- To find the coordinate of any point, click on the Get Coordinates button on the top of the calculator, which appears like the below image:

After selecting the Get Coordinates button, move the cursor to the point at which we want to find the coordinates. The value will appear on the calculator with respect to X, Y, and Z-axis, which is shown below:
To cross-check the above value, click on the Utilities on the Ribbon panel, click on ID Point, and specify the same point using cursor. The value will appear as shown below:
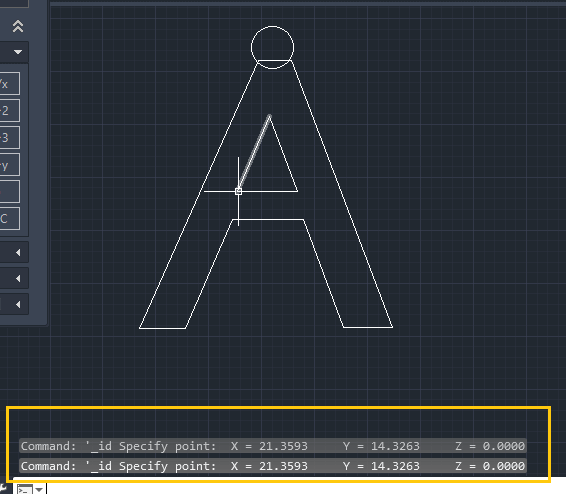
We can notice that both the values are identical.
To clear the last value, we need to click on the Clear button – 
To clear the history, we need to click on the Clear History button – 
- If we want to paste the calculated value on the command line, we need to click on the
 button.
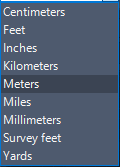
 - To convert units, we need to select the option from the drop-down list of each category. It is shown in the below image:
 button.
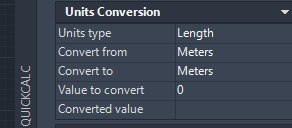
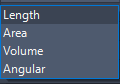
The drop-down list for the ‘Unit type‘ is shown in the below image:
The drop-down list for the ‘Convert from‘ is shown in the below image:
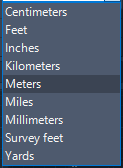
The drop-down list for the ‘Convert to‘ is shown in the below image:
The Value to convert includes the value that we want to specify for conversion.
The Converted value represents the output of the conversion.
We can select any option from the drop-down list according to our choice.
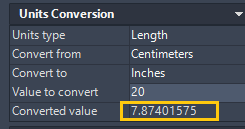
Let’s consider an example to convert 20 Centimeters into Inches. The output is shown in the below image:
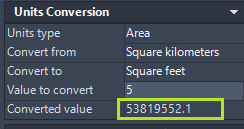
- Let’s convert Area from Square Kilometers to Square Feet.
The output is shown in the below image:
- Let’s calculate the distance between two points. We need to select the option from the top of the calculator, which will look like the given image:

To calculate the distance between two points, we need to choose any two points in our drawing.
The value will be calculated as a straight line between two points.
Let’s consider an example. The example is shown in the below image:
The output of the two points given in the above image is shown below:

Similarly, we can calculate the distance between any two points in any order of our drawing.
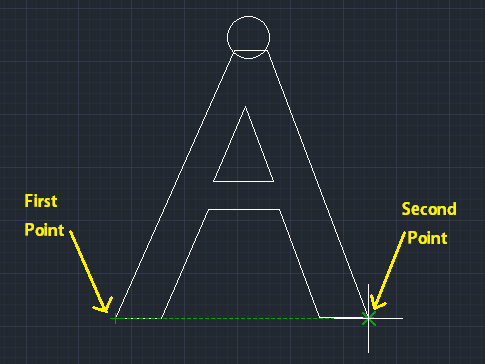
- Now, let’s calculate the angle. To measure the angle with respect to the positive X-axis, we use this tool.
We will click on the first point and second point as shown in the below image:
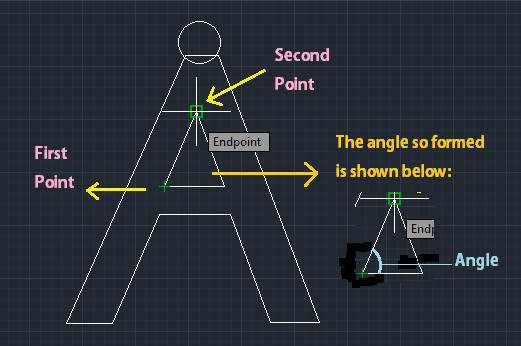
We can also specify any points to measure the angle according to the requirements.
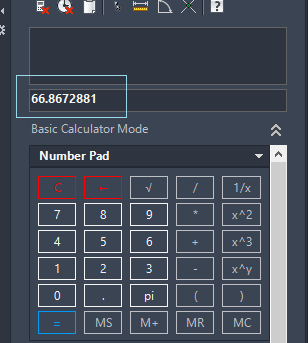
The value of angle so formed is given in the below image:
We can also cross-check this value from the dimensions box.
To cross-check, type DIMANGULAR on the command line and specify the first and second line. We will get the corresponding value as shown in the below image:
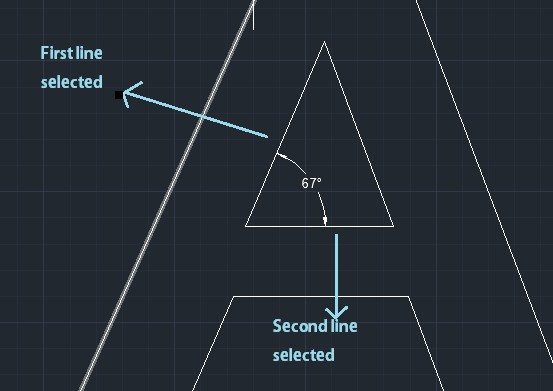
Since, the precision value is 0, we will get the approximate value.
To measure the exact value, we can measure it through the calculator.
- Let’s calculate the intersection of two lines defined by four points.
It will find the coordinate of the intersection of two lines.
To find the coordinate of the intersection point, select the four endpoints of the two intersection lines, as shown in the below image:
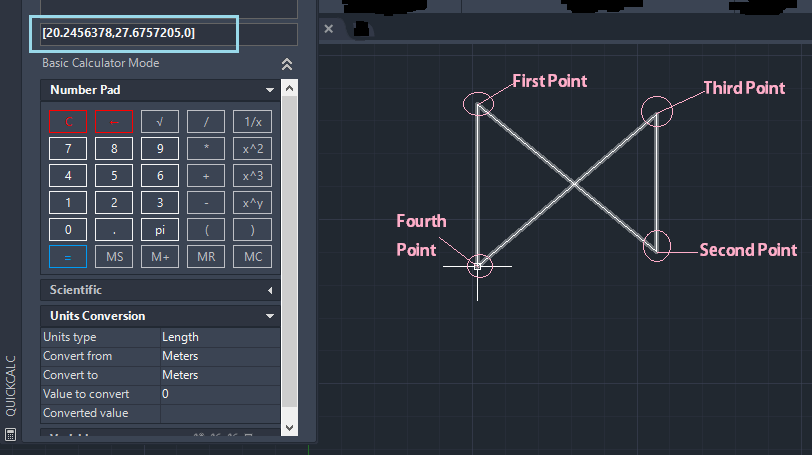
We need to make sure that the selected points should be the endpoints of the two intersection lines, as shown above.
To cross-check, we can find the coordinate of the intersection points using the get coordinates option.
We can also cross-check using the ID point in the Utilities on the Ribbon panel.