Composition in Adobe After Effect
A composition is a framework in Adobe After Effect. All the Compositions have a separate timeline. It includes multiple layers that display video/audio footage items, vector graphics, still images, animated text, and lights. We will add footage to the Composition by generating a layer. We will then arrange the layers inside Composition in composite and space and time using transparency features. It helps determine the parts of underlying layers displayed through the layers stacked on top of Composition.
Creating a composition and manually setting up composition settings
Step 1: Go to the Composition Menu.
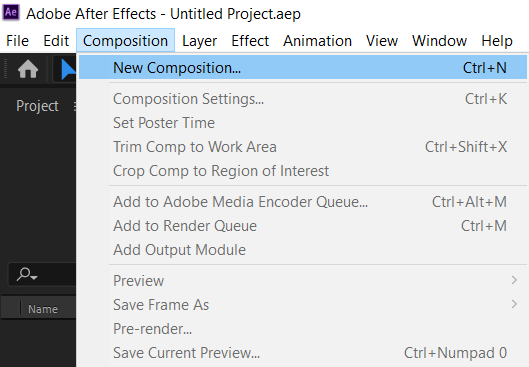
Step 2: Click on New Composition/press Ctrl+N to create a new composition.
How to create a composition using a single footage item
- Select and drag the footage item to the Create A New Composition button at the bottom of the Project panel or Go to the File menu → Select New Composition.
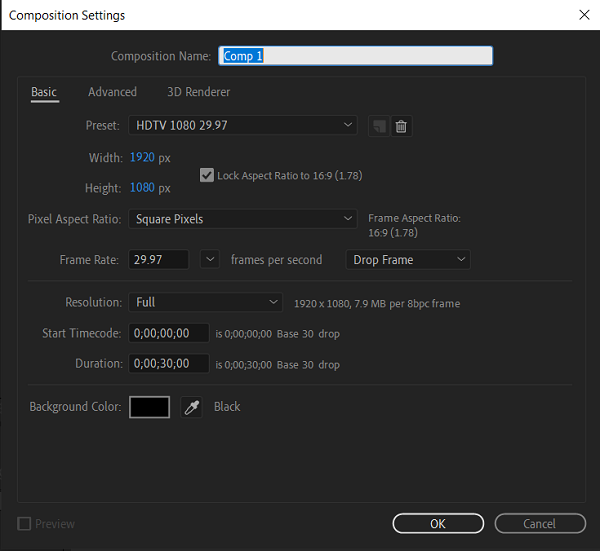
- Go to the Composition settings, frame size (width and height), and pixel aspect ratio will be set to automatically match the project’s characteristics.
Creating a composition from multiple footage items
Step 1: Go to the Project panel and select the footage items.
Step 2: Drag it to the Create A New Composition button at the bottom of the Project panel, OR Click on the File menu → New Comp From Selection.
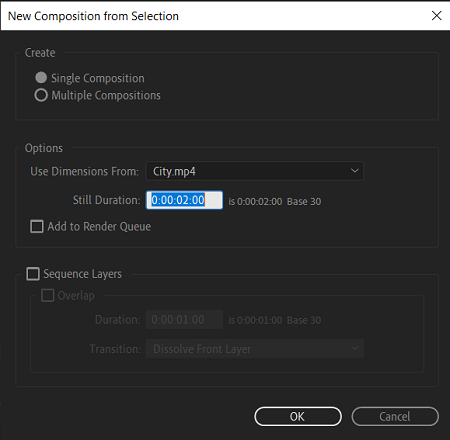
Step 3: Select any of the form from the Composition setting dialogue box:
- Use Dimensions Form: Select the footage item from where the new Composition gets composition settings, pixel aspect ratio, and frame size.
- Still Duration: It can be used to add the duration for the still images.
- Add To Render Queue: It can be used to add the new Composition inside the render list.
- Sequence Layers, Overlap, Duration, and Transition: It can be used to set the transitions, layers in a sequence, choose a transition type, and optionally overlap them in a time set.
Create multiple compositions from multiple footage items
Step 1: Go to the Project panel and select the footage item.
Step 2: Click and drag it to the Create A New Composition box at the bottom of the Project panel, or click on the File menu → click on the New Composition from the drop-down menu.

Step 3: Select Multiple Compositions and other settings in the New Composition From Selection dialog box
Adobe After Effect Timeline panel
Composition in After Effect has its Timeline panel. We can use it to perform several tasks, for example – animating layer properties, setting blending modes and arranging layers in time. The layers available at the bottom of the stacking order inside the Timeline panel will be rendered first. But in the case of 2D image layers, it appears at far-back in the Composition panel and the final composite.

On the left side of the Timeline panel, you can get the columns of controls for layers. On the right side of the Timeline panel, you can see the time graph, and it also contains a time ruler, expressions, markers, keyframes, duration bars for layers (in layer bar mode), and the Graph Editor.
After Effect Composition Settings
Do one of the following to change composition settings:
- Click on the Project panel and select a composition / activate the Timeline. After that, Select Composition → click on the Composition Settings.
- Go to the Project panel and Right-click on the Composition, and go to the context menu to select Composition Settings.
- To store a custom composition settings preset, set Height, Width, Frame Rate Pixel, and Aspect Ratio values in the Composition Settings, and finally, click on the Save button.
- Choose the preset from the Preset menu in the Composition Settings dialog box to delete a composition setting preset, then click on the Delete button.
- Press Alt-click and the Delete button to restore default composition settings presets. Or click on the Save button in the Composition Settings dialog box.
Advanced settings for compositions
Anchor: Click on the arrow button as shown in the image below to anchor layers asides the corner or edge of the Composition as it can be resized.
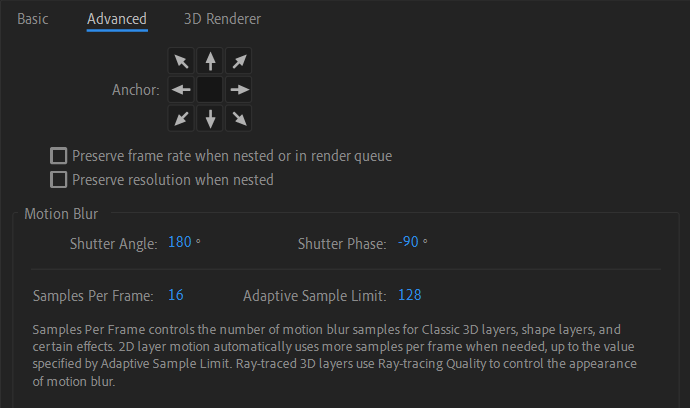
Resolution: Preserve resolution when nested and Preserve frame rate when it was nested or is queued in the render queue. Suppose you want to retain a composition’s resolution or frame rate but do not want to inherit those Composition settings. Then it would be best if you preserved the frame rate for that Composition when it will be nested. Similarly, the rotoscoping results may look unstable when converted to a different frame rate or resolution. You can use these settings instead of the Posterize Time effect, which is less efficient.
Motion Blur settings in After Effect
- Shutter angle: It simulates the exposure allowed by a rotating shutter and can be measured in degree. It uses the footage frame rate to determine the simulated exposure that affects the amount of motion blur. Such as entering 90° for 24-fps footage that creates an effective exposure of 1/96. 1° applies almost no motion blur, and entering 720° applies a huge amount of motion blur.
- Shutter phase: It can be used to define an offset that notifies us when we open the shutter relative to a frame’s starting. When you adjust this value, it helps an object with motion blur applied appears to lag behind the object’s position without any motion blur.
- Samples per frame: It is the minimum number of samples. The number of samples uses the frames for which Adobe can not determine an adaptive sampling rate based on layer motion.
- Adaptive sample limit: It is the maximum number of samples.