How to use GIMP
GIMP is an open-source image editor that allows us to create and edit high-quality images and logos. It is one of the most used tools for photo editing and other graphical tasks. It supports plenty of tools to edit the photos; It is a trendy tool among photographers and graphic designers.
Its never been easy to edit and create different types of images. But, GIMP allows us to these tasks so quickly using its wide range of built-in tools and plug-ins. It is a great alternative to Photoshop; All the functionalities and tasks almost go the same as Photoshop. We can create web designs, graphic arts, advertisement banners, logos using GIMP.
In this section, we are going to explain a quick guide for using the GIMP. We will see how to install and use GIMP. We have made a detailed tutorial on each topic; check out our GIMP Tutorial.
Before using the GIMP, let’s understand how to download and install the GIMP:
How to Download and Install GIMP
There are many ways to install GIMP in Linux. It can be downloaded from the Ubuntu store, from the official website of GIMP, by downloading the source code or by the terminal.
To download & install GIMP on Linux, execute the following commands:
Add the PPA Repository by executing the below command:
Update APT package:
Install GIMP:
The above commands will download & install the latest version of GIMP. Run it by browsing applications from the Show Applications menu.
To download and install it on Windows, follow this link and download the installer file:
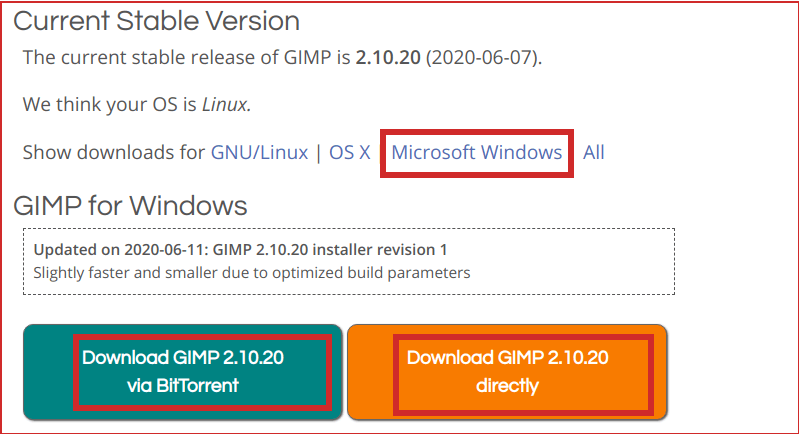
There are two download options available. Either we can download it via torrent or directly after downloading the installer file, double-click on the installer file and follow the instructions. It will install the downloaded version of GIMP on our Windows machine. For more detail, visit our detailed tutorial on how to Install GIMP on different platforms.
After installation, we can use it for editing, drawing, and other graphical tasks. Let’s get familiar with its user interface:
GIMP User Interface
The GIMP has a straightforward interface, just like a typical photo editor such as Photoshop. It comes with four default color themes that are Dark, Gray, Light, System. It looks as follows:
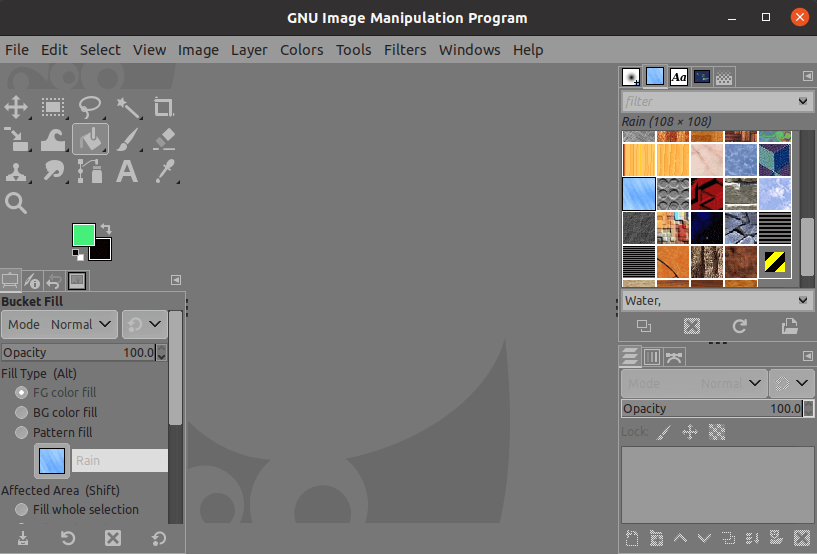
Our Currently applied color theme is Gray. You can change it by navigating the Edit->Preferences-> Themes menu. The GIMP’s home interface contains several different windows and an editor in the center. The top navigation bar contains a menu that has all the menu entries.
The left side of the GIMP contains two different windows for the toolbox and tool option. The toolbox contains and displays the active tool, and the tool option contains quick settings for the active tool.
The right side contains dockable dialog windows for the layers, brushes, patterns, etc. We can manage the right side dockable window and choose which window will be visible here. The left menu can not be changed; we can change the tools icon only, not the format.
To change the dockable dialog window, navigate the Windows-> Dockable Dialog Window menu and choose what you want to display here. Since we are familiar with the user interface, let’s understand other tasks:
How to Create or Open an Image Using GIMP
We can create an image and draw it using different drawing tools. To create an image, select the new option from the File menu or hit the CTRL+N keys. To open an image, select the Open option from the File menu or hit the CTRL+O keys; We can also drag the image to GIMP from our file explorer.
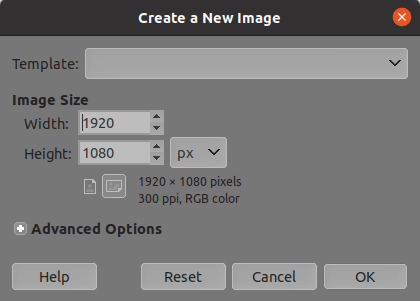
The New option will ask for the image properties, define the image properties and click OK to create a blank image:
It will create a blank image and open it in the editor:
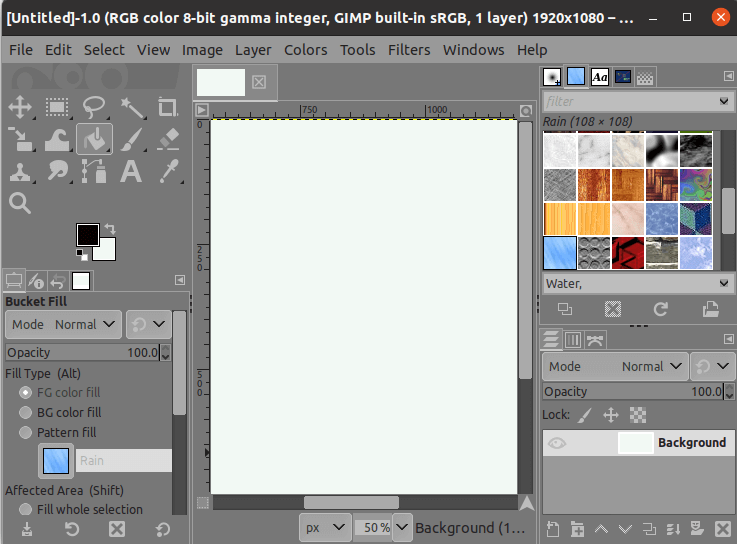
Now, we can draw it by using the different paint & selection tools. To access these tools, navigate to Tools-> Selection Tools, Tools-> Paint Tools, etc. For example, if you want to draw from a pencil, select the pencil tool from the Tools-> Paint Tools menu. It will allow us to draw the pencil to the Image canvas; you can draw whatever you want.
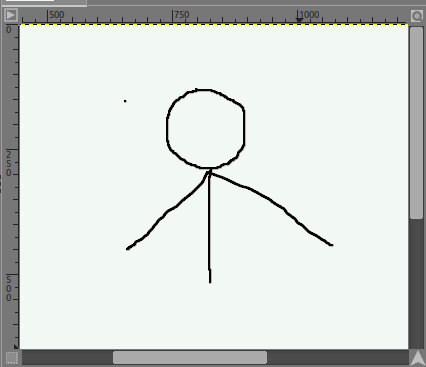
Similarly, we can draw rectangle, circle, ellipse, arrow and other shapes using the respective tools. We can also add text to our image using the text tool.
To open an image, select the Open option from the File menu or hit the CTRL+O keys. It will open a window to select the file from the file system:
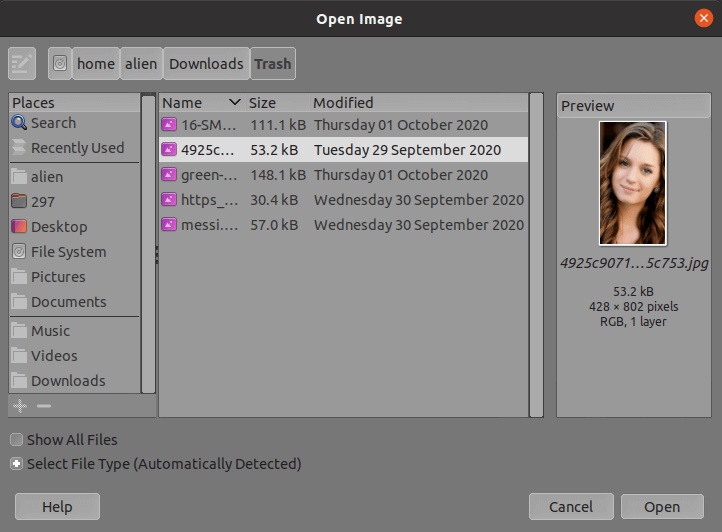
Navigate to the directory where the image is located and select the image; click Open. It will open the image with the editor. We can also do the same by dragging the image into GIMP.
How to Add Text to an Image
To add text, create or open an image, then select the text tool from the Tools menu or hit the T key. We can also do the same by clicking on the below icon in the toolbox:
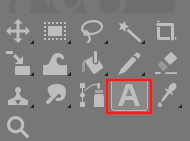
It will activate the text tool. Now, click anywhere on the image canvas and start entering the text.
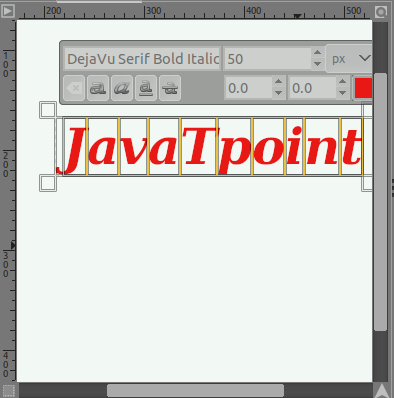
We can adjust the text setting, such as size, color, fonts, etc., from the tool options window. If we want to edit this text, double click on the text and edit it by selecting.
How to Save the Image
GIMP provides different options such as save, save as, export, export as, to save the image. The different options in the File menu to save the image differently.
Save: The save option is used to save the image in XCF format, which is the default image format of GIMP. It saves the work as it is; if our image contains layers, it will save the image having layers. We can access them later using the Open as Layers option.
Save As: The Save as option is used to save the Image in XCF format, but it allows to save the file with a different name.
Export: The Export option is used to save the file in a different image format such as jpg, png, etc. We can specify the file name and image format by using this option. It is a recommended option because the XCF image format is not supported by most of the tools.
Export As: The Export As option is used to save the file in a specific image format such as Png, jpg, etc., with a different file name. Usually, it is used to create a copy of the image.
Let’s understand some more useful tasks such as resizing and cropping.
How to Crop and Resize the Image Using GIMP
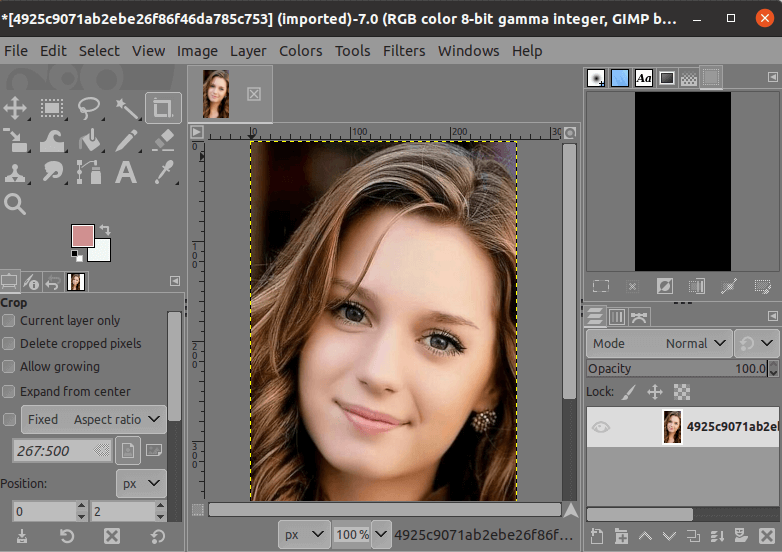
To crop an image, open the image and select the crop tool. To open the image, select the Open option from the file menu.
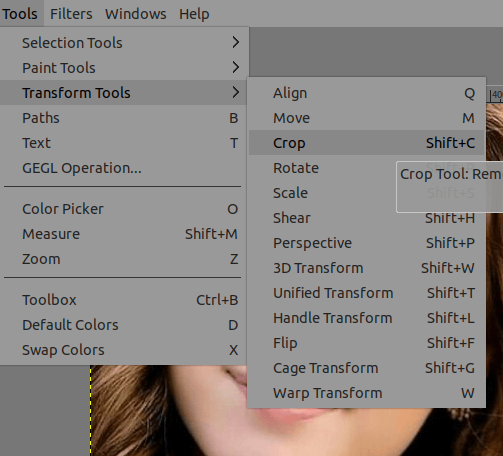
Now, select the crop tool for cropping the image. To activate the crop tool, navigate to Tools-> Transform Tools-> Crop menu or hit the SHIFT+C keys.
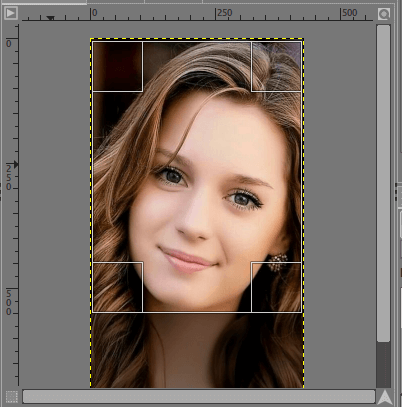
It will activate the Crop tool, specify the region to be cropped by dragging on the image canvas:
Now, hit the enter key after selection. It will crop the selected region. For more detail, visit our detailed tutorial on how to crop an image using GIMP.
To resize the image, select the scale image option from the Image menu.
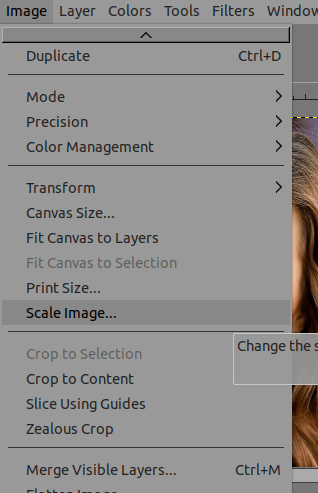
It will open a dialog window to specify the image properties.
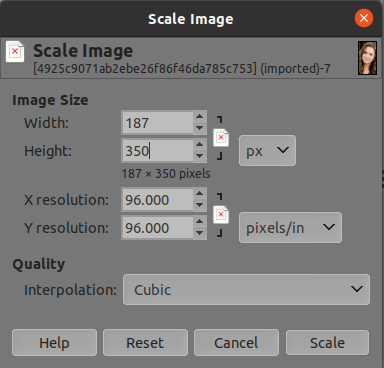
After specifying the image properties such as width, height, X resolution, and Y resolution, select the Scale option. It will reduce or enlarge the size of the image. For more details, visit our detailed tutorial on how to resize an image in GIMP.
How to Rotate an Image Using GIMP
Another basic task of photo editing is to rotate an image. Gimp supports several tools to perform basic tasks. The rotate tool is one of the most used tools of GIMP.
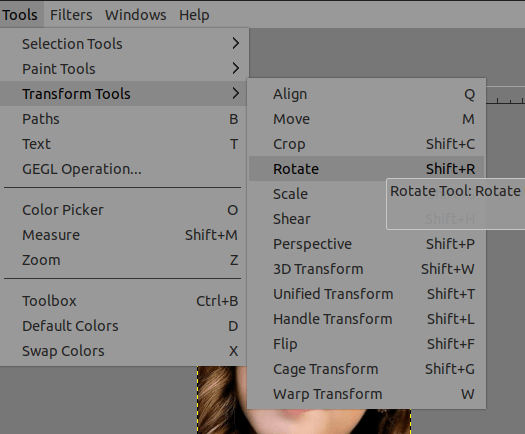
We can rotate an image using the Rotate tool. To activate the rotate tool, select the Rotate option from the Tools-> Transform Tools menu or hit the SHIFT+R keys.
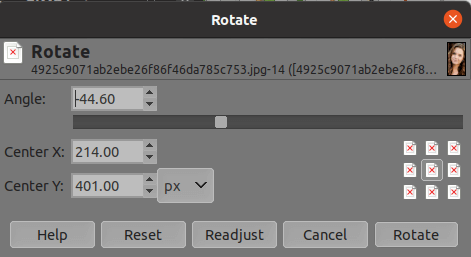
It will activate the rotate tool. We can rotate the image either by specifying the rotation angle or by clicking on the image.
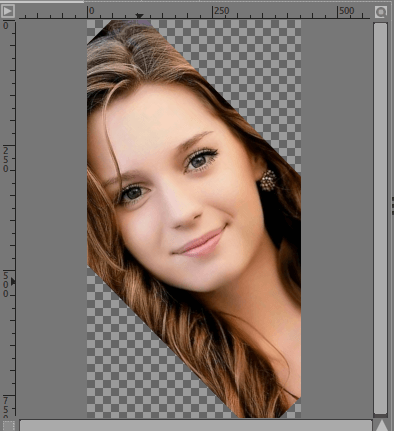
It will rotate the image with the specified angle:
How to Edit Photos Using GIMP
The editing is an essential task for an image manipulation tool; It contains image refixing, retouching, applying filters, making blur, and several other tasks. GIMP provides built-in tools for performing all of these tasks. We can explore most of the editing tools from the Filters or Colors tools.
We can change the image colors, remove the background of an image, refix the image, or other editing using GIMP. Let’s see some useful tools for editing:
Heal or Clone Tool: The Heal or clone tool can be found under the Tools-> Paint Tools menu. These Tools are useful for removing the spots or wrinkles from the image. It is also used for removing an unwanted element from the image.
It works like a brush tool that allows us to paint over the defected area by copying a specific region from an image or other image. For example, if we want to remove the face’s wrinkles or spots, copy a similar region from the face and paste it over the spot. It will remove the spot and match it with the face.
The Heal and Clone both tools work similarly. There is not much more difference between both tools.
See how to use the clone Tool & Heal Tool.
Useful Filters: GIMP supports several color filters that allow us to change the colors of the image. These filters are useful for providing an artistic or natural look to our image. Some useful filters for changing the colors of an image are as following:
- Color Balance: The color balance tool can be found under the Colors menu. It efficiently changes the colors of an image. We can see a preview while applying this filter.
- Saturation: The saturation tool can be found under the Colors menu. It is also used to apply the color filter. It automatically adjusts the colors of the image. There are two types of saturation tools available in GIMP, i.e., saturation & hue saturation.
- Hue Chroma: The Hue and Chroma are two different color properties of the image that define the image’s saturation. It is also one of the most used methods to edit the colors of the image. It makes the images attractive and beautiful.
- Color Curves: The Color Curve is also one of the most popular and useful ways to change and adjust the image’s colors. It allows us to define the level of all available colors of the image. It is an efficient way to change the colors lightly.
Apart from the above filters, there are several color filters available in GIMP. These color filters can be found under the Colors menu.
For adjusting the colors of an image, visit our detailed tutorial on how to change colors in GIMP.
Blur an image: GIMP offers several blur tools to apply the blur effect on an image. Each effect has its unique blur effect. To blur the image, select a blur tool from the Filters-> Blur menu.
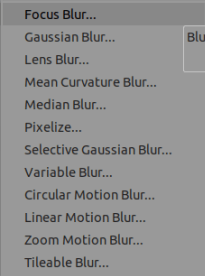
For more detail on each blur tool, visit GIMP Filters.
The above-discussed tools & filters are for basic editing. For some advanced tasks, visit our detailed tutorial on removing the background using GIMP, Photo editing in GIMP, creating a logo using gimp, etc.
Summary: We have discussed a quick guide for using the GIMP. For further reading, visit our complete GIMP Tutorial.