Sign-in with Apple using swift
Apple allows the users to sign in to the applications with their apple ids. Users can choose the sign-in with apple option to start using the app right away, instead of filling out forms and create new passwords. Apple doesn’t track the user’s activity in the application. Apple doesn’t collect a lot of information from the user; it’s only limited to the user’s name and email address.
However, users can always choose not to share the name and email address that enhances the user’s privacy. Each account with Apple sign-in is protected with two-factor authorization. Sign-in with apple works on iOS, macOS, tvOS, and watchOS. It can also be deployed to websites and versions of the app running on various other platforms. In this tutorial, we will discuss how to enable Apple Sign-in in the iOS application developed in swift.
Enabling Sign-in with Apple in the iOS app
To enable sign-in with Apple in an iOS application, we need to follow the steps given below.
1. Configure app id in Apple Developer Account
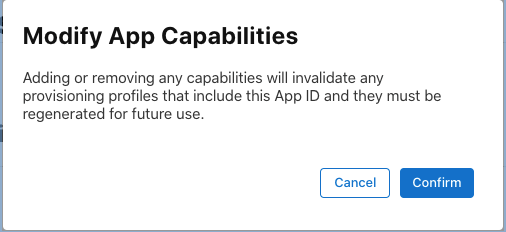
First of all, we need to add the Sign-in with Apple capability to the app-id in Apple Developer Account. To configure the app id, login to the Apple developer account and proceed to the Certificates, Identifiers, and Profiles section. Select the app-id in identifiers used in the XCode project, check the sign-in with apple capability from the list of capabilities, and click save. Consider the following image.

Modifying or adding a capability invalidates our associated provisioning profiles, and we need to generate them again.
2. Configure XCode Project
We are all done with setting up our app id in Apple Developer Account to enable Sign-In with Apple. However, we also need to set up the XCode project or add sign-in with apple capability in the existing XCode project. In this tutorial, we will create a demo project and enable sign-in with apple.
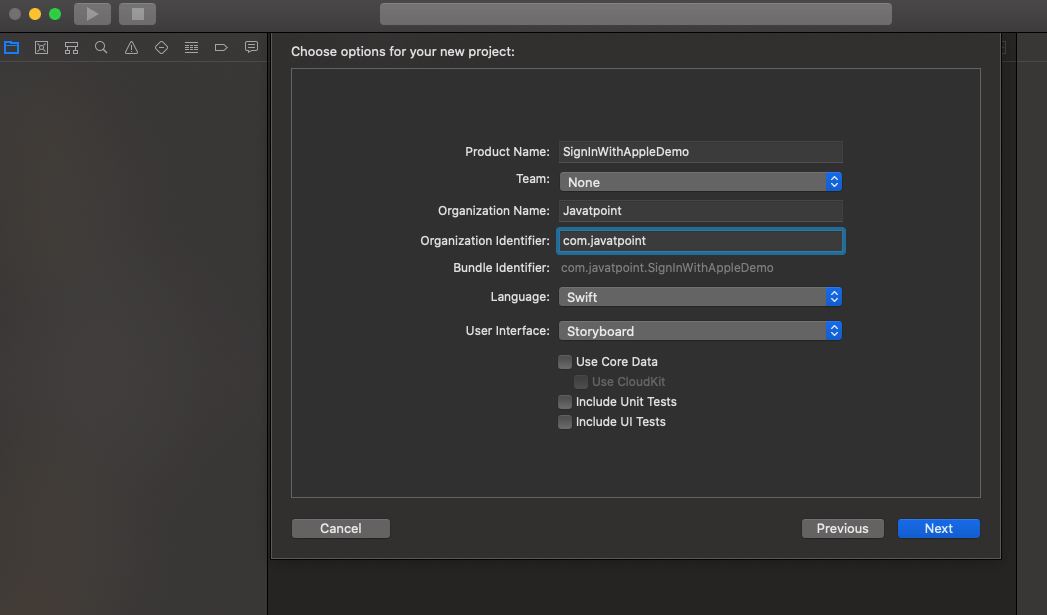
For this purpose, create a new single-view iOS application, as shown in the following image.
Once we are done creating the project, we need to navigate to Signing and Capabilities in XCode, as shown in the below image.
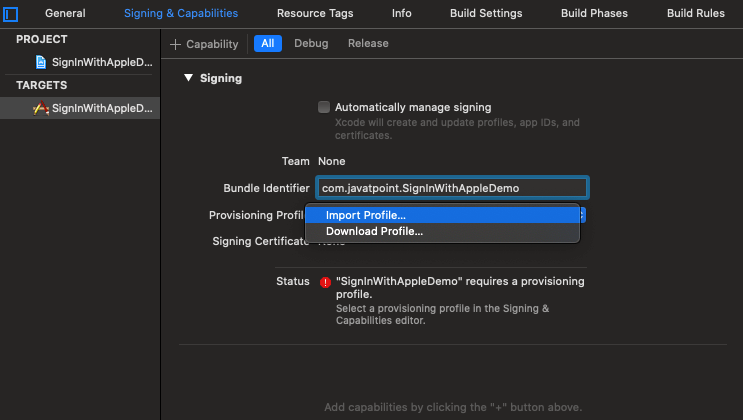
Now, import the associated provisioning profile with the bundle identifier that we have downloaded from the Apple Developer Account. Once we are done setting up the provisioning profile, we need to tap the + icon and choose the sign-in with apple from the list of options. However, XCode will give an error if we haven’t added the capability to the app id (bundle identifier) in the Apple developer account yet. Since this is not our case, we will get Sign-in with Apple capability added to our project.
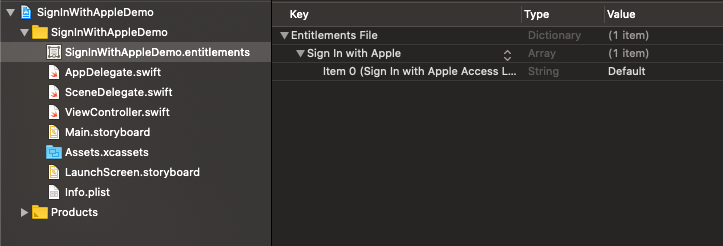
This will also create an entry into our project entitlement file named as SignInWithAppleDemo.entitlements as shown in the below image.
The source code of the SignInWithAppleDemo.entitlements file is given below.
3. Implementing Sign-in functionality
As we are done with the configuration in the developer account and XCode, we can now implement the actual code to add sign-in with Apple functionality. For this purpose, we need to import the Authentication Services framework. First, we need to create an apple sign-in button in our View Controller.
To setup the apple sign-in button, add then following code above viewDidLoad() in View Controller.
In viewDidLoad(), we will set up the frame for the appleLoginButton to look in the center of the screen.
Add the following code to the viewDidLoad() of the View Controller.
Now, we need to add the target method signInWithApple() method in View Controller so that when we tap on the Apple login button, the target method gets called.
Add the following method to the View Controller.
In the above method, we create the request object created by the createRequest() method of the appleIdProvider object. We can set the requested scopes to the request object, which can either be fullName or email or both. We also need our view controller to conform ASAuthorizationControllerDelegate protocol and implement its delegate methods.
The following delegate method gets called when the sign-in attempt is successful.
We can also check the user’s credentials at the application launch. For this purpose, we need to call the getCredentialState() method in didFinishLaunchingWithOptions method of AppDelegate. Add the following code in didFinishLaunchingWithOptions method.
Now, we are done with the code, let’s run the app in the simulator and check whether the sign-in with apple is enabled or not.
The following screen will be shown in Simulator.

When we tap on the Sign in with Apple button, we will be navigated to the next screen, as shown below.
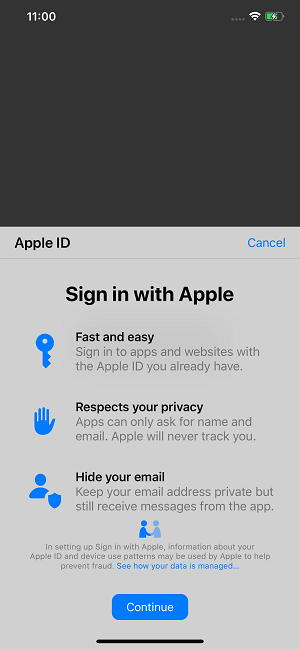
Now, we can click continue to complete the sign-in process in the application.
Check the complete View Controller code (for the complete process) given below.