What is CoreML?
Machine learning is a need of the hours in today’s tech world, and so are iOS applications. CoreML allows us to integrate machine learning into iOS apps. It performs two main tasks.
- It facilitates us to load pre-trained machine learning models. CoreML helps us to convert our pretrained MLModels into classes that can be used with XCode.
- CoreML allows us to make predictions. We have the model loaded locally on the device once the user downloads the app. Our app will use this model to make predictions for image recognition, speech recognition, etc.
We can go to https://developer.apple.com/machine-learning/ to get an overview of how we can use machine learning to incorporate it with iOS applications. It also provides ready-to-use (pretrained) models in the models section, I.e., https://developer.apple.com/machine-learning/models/.
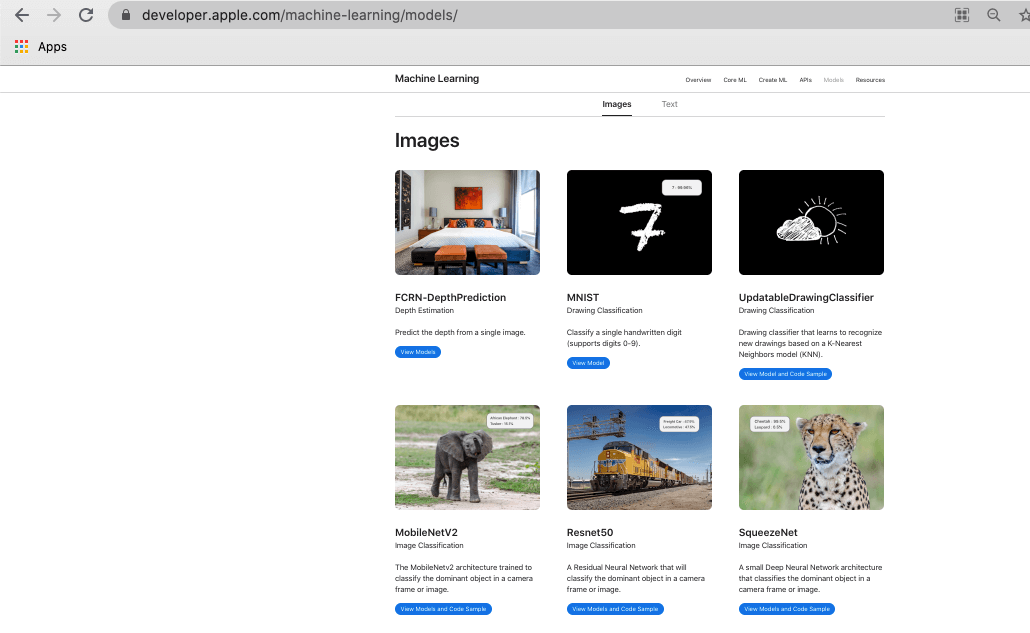
In this tutorial, we will use the MobileNetV2 model, which is being trained to classify the dominant object in a camera frame or image. We will use this to identify the photo taken by the user in the app.
However, CoreML cannot use any of the app’s generated data to train the model further. The pretrained model loaded in the app remains as the static model. We also need to understand that the CoreML being used in the app is not encrypted; I.e., If we need to use any model for the banking application like the stock market, we need to be aware that we should not use this with CoreML to incorporate it with iOS applications.
The best part of CoreML is that, even if we don’t know much about machine learning, we can still use this to incorporate our apps with machine learning.
Creating a CoreML app
Let’s create an iOS app that will use CoreML to incorporate Machine Learning. As we have already stated in this tutorial, we will use the MobileNetV2 pre-trained model provided on https://developer.apple.com/machine-learning/models/. This will detect the dominant object in the camera frame.
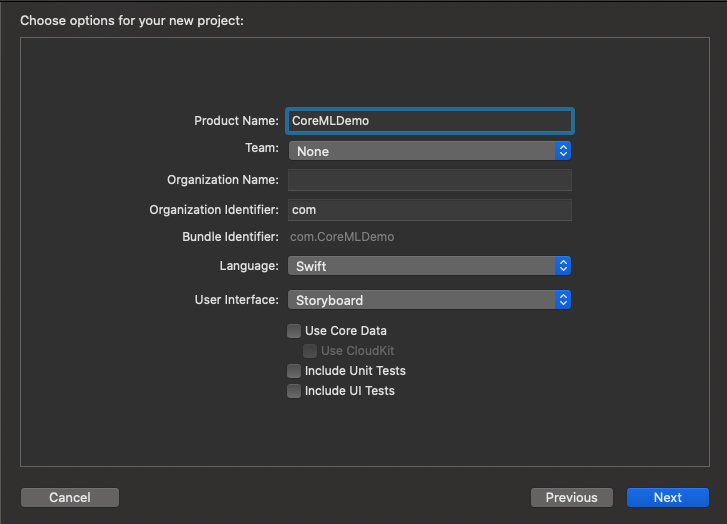
To create a new XCode project, go to File -> New -> Project in XCode and choose Single View App. Now, provide the app information like bundle id, app name, organization name as shown below.
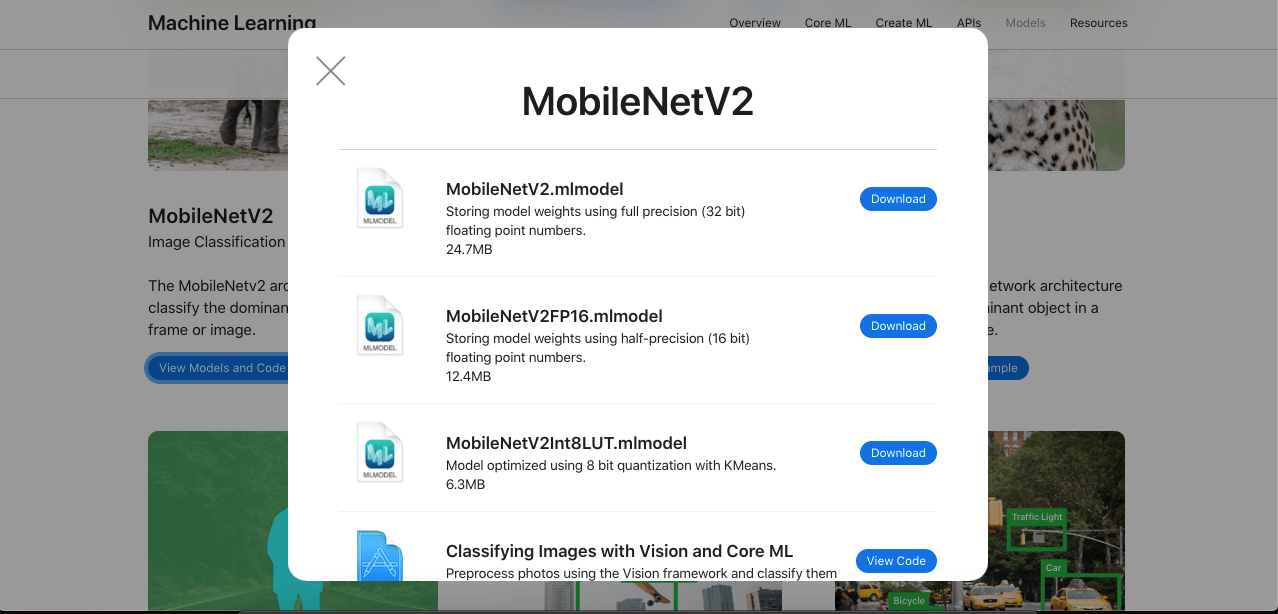
Once we are done with creating the iOS app, the first thing we need to do is to incorporate a pre-trained image recognition model into our new XCode project. For this purpose, navigate to https://developer.apple.com/machine-learning/models/ and select MobileNetV2 to download the .mlmodel file. Click the Download button to download the mlmodel file as shown below.
Once we are done downloading the .mlmodel file, we need to add it to XCode. For this purpose, open the folder in which the .mlmodel file is downloaded and drag it into XCode to drop this.
Once we do so, we will get the .mlmodel file added to XCode, as shown below.

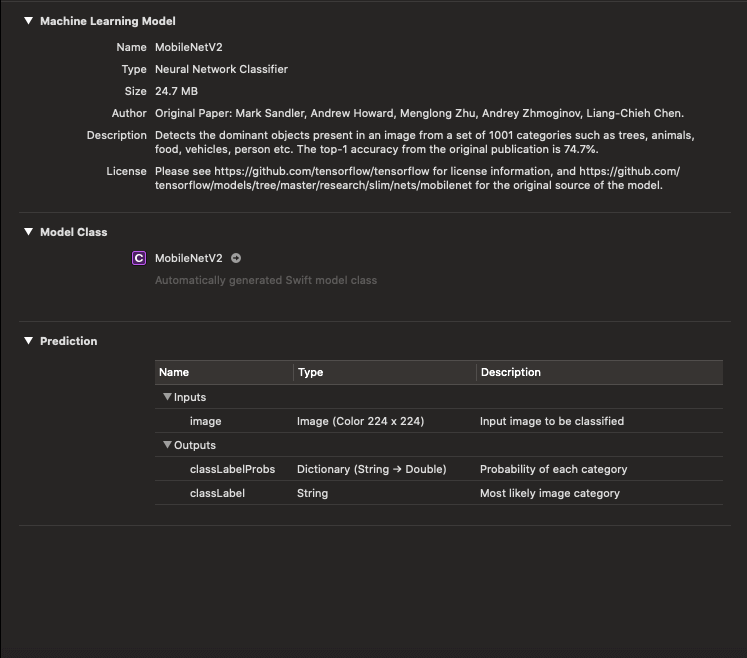
Once we open this file, we will see its information in XCode along with the model class that has been created by XCode.
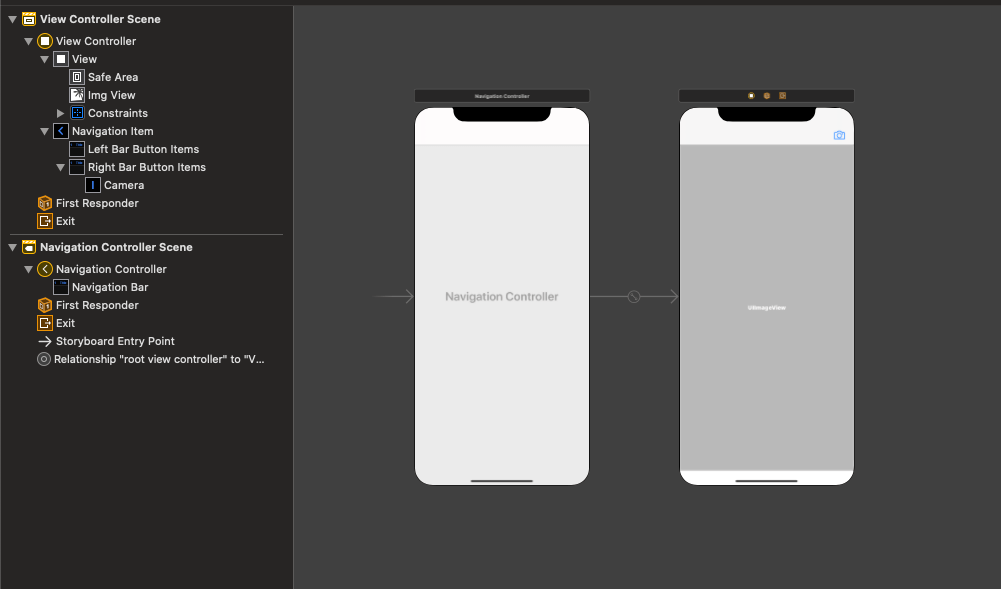
Let’s set up the interface builder first. In the storyboard, we need to embed our View Controller in the navigation controller and add a bar button item to open the camera when it is tapped. We will also add an image view to the ViewController to show the image taken from the camera.
Now, we need to incorporate our model into our View Controller. For this purpose, we need to import CoreML and Vision in our ViewController class. We will also conform our ViewController to UIImagePickerControllerDelegate and UINavigationControllerDelegate.
Add the following code to implement the camera functionality to the app, where the camera will get opened when the user taps the camera bar button item.
Now, we need to send the captured image to the Machine Learning Model. For this purpose, first, we need to access the captured image in View Controller. Add the delegate method, i.e., imagePickerController(_ picker: UIImagePickerController, didFinishPickingMediaWithInfo info: [UIImagePickerController.InfoKey : Any]) to the ViewController .
Now, we need to implement the detect function to detect the image we have captured. First, we need to convert our image to CIImage to use it with our MLModel.
To convert the image into CIImage, add the following code after dismiss() is being called.
We need to detect this ciImage by using the model. For this purpose, add the following code to the ViewController.
We also need to call the detect() method just after we are getting CIImage. We also need to pass the CIImage to this detect () method. Add the following code to call the detect() in the delegate method in which we are getting the object of CIImage.
Now, build and run the project, capture any image and look at the results we are getting. Let’s click a computer’s image by browsing for it on the web.
Once we take the photo and proceed with it, we will see the results printed on the console, as shown below.
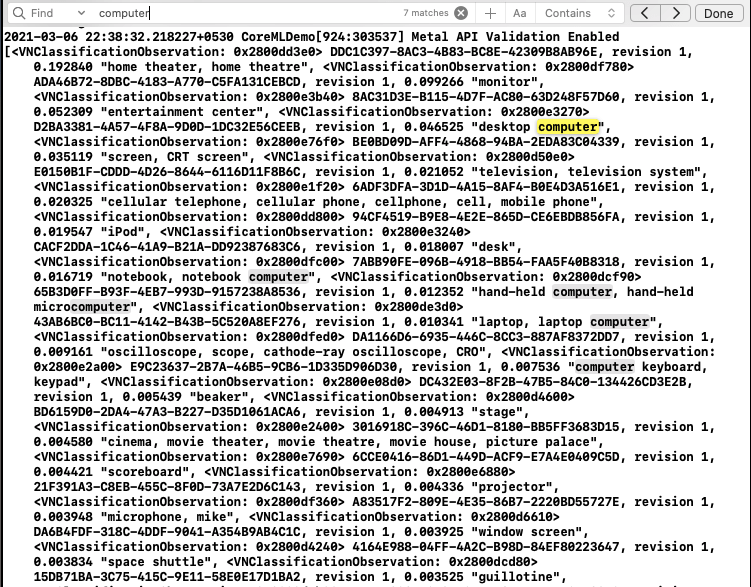
As we can see, the model has classified the image and produce the results that contain all the possible objects the image can be.
Now, we can check the result’s first object as it will be the most possible object the image will be. In this project, we capture a car object and see whether the results contain the Car as the first object.
For this purpose, add the following code in the completion handler just after getting the result object.
This will change the navigation bar title according to the object captured.
Our ViewController.swift contains the following code.